Are you looking for a reliable Family Tree Maker Support Number to resolve software issues quickly? Whether you are experiencing installation errors, sync problems, data loss concerns, or performance issues, professional assistance can help you get back to building your family history without delays.
Our dedicated support team provides technical guidance for Family Tree Maker users who need help with troubleshooting, software setup, upgrades, backups, and data synchronization. With years of experience handling genealogy software issues, we offer step-by-step assistance to help resolve common and advanced Family Tree Maker problems.
Why Contact a Family Tree Maker Support Number?
Family Tree Maker (FTM) is one of the most popular genealogy software programs used to create, organize, and preserve family history records. While the software offers powerful features, users may occasionally encounter technical issues that require expert assistance.
Common issues include:
- Family Tree Maker installation errors
- Software activation problems
- Ancestry sync issues
- TreeVault synchronization errors
- Corrupted FTM files
- Missing family tree data
- Backup and restore failures
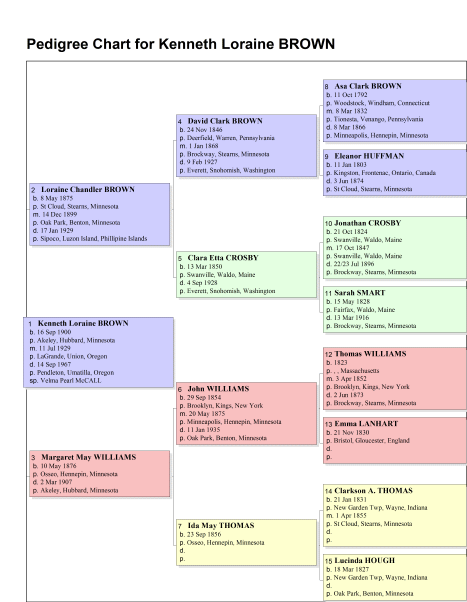
- Chart and report generation errors
- Software crashes and performance problems
- File transfer issues between computers
If you are facing any of these challenges, contacting a trusted Family Tree Maker Support Number can help you find a solution quickly and efficiently.
Family Tree Maker Support Services We Provide
Our technical experts assist users with a wide range of Family Tree Maker-related issues.
- Family Tree Maker Installation Support
If you are unable to install Family Tree Maker on your computer, our team can guide you through the installation process and help resolve compatibility issues.
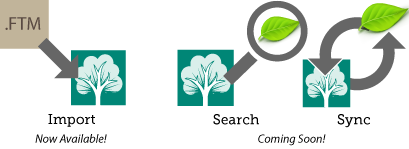
- FTM Sync Error Resolution
Many users experience syncing problems between Family Tree Maker and Ancestry. We provide troubleshooting assistance to restore synchronization and protect your family tree data.
- Backup and Restore Assistance
Regular backups are essential for protecting years of genealogy research. Our experts can help create, restore, and manage backup files safely.
- Data Recovery Services
If your family tree file becomes corrupted or inaccessible, our support team can assist with data recovery options and troubleshooting methods.
- Software Upgrade Support
Upgrading from older versions to newer Family Tree Maker releases can sometimes create technical complications. We help ensure a smooth upgrade process while preserving your valuable data.
How to Contact Family Tree Maker Support: Call Our Support Team
Family Tree Maker Support Number: +1-888-257-3335
Follow These Simple Steps
- Call the support number.
- Explain the issue you are experiencing.
- Receive guided troubleshooting assistance.
- Follow expert recommendations.
- Resolve your issue and continue working on your family tree.
Our goal is to provide prompt and reliable support so you can focus on preserving your family history.
24/7 Family Tree Maker Technical Support
Technical issues do not always occur during business hours. That’s why assistance is available around the clock for users who need help with:
- Family Tree Maker installation
- Software upgrades
- Syncing and connectivity issues
- Data backup and recovery
- File migration and transfer
- Error troubleshooting
- Performance optimization
With professional support available when you need it most, you can minimize downtime and continue your genealogy research with confidence.
Is Remote Support Safe?
Security and privacy are important when receiving technical assistance.
Our remote troubleshooting process is designed with user safety in mind.
Security Features
- Secure remote support tools are used
- Access is limited to troubleshooting activities
- Users can monitor sessions in real time
- No unauthorized access to personal information
- Sessions can be terminated by the user at any time
These practices help ensure a safe and transparent support experience.
Third-Party Service Disclaimer
Tane Innovative Concepts LLC is an independent third-party technical support provider located in Texas, United States.
We are not affiliated with, endorsed by, or associated with Family Tree Maker, Software MacKiev, or Ancestry. We provide independent technical assistance for users seeking professional support for Family Tree Maker software-related issues.
Popular Family Tree Maker Issues We Fix
Our support specialists regularly assist with:
- Family Tree Maker 2017 installation issues
- Family Tree Maker 2019 troubleshooting
- Family Tree Maker update errors
- Ancestry synchronization problems
- TreeVault connection issues
- Family tree chart printing errors
- FTM file corruption recovery
- Family Tree Maker login problems
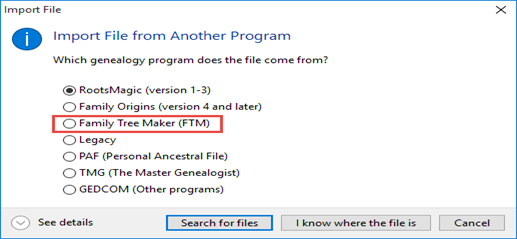
- Data migration between computers
- Software performance optimization
Helpful Family Tree Maker Guides
You may also find these guides useful:
- How to Install Family Tree Maker 2017
- Upgrade to Family Tree Maker 2019
- Fix Family Tree Maker Sync Errors
- Transfer FTM Files to a New Computer
These resources can help users resolve many common problems independently.
Frequently Asked Questions
Question: What is the Family Tree Maker Support Number?
Answer: Users can contact +1-888-257-3335 for technical assistance related to Family Tree Maker installation, updates, syncing, and troubleshooting.
Question: Can I get help with Family Tree Maker sync issues?
Answer: Yes. Technical experts can assist with resolving sync errors between Family Tree Maker and Ancestry accounts.
Question: Is Family Tree Maker support available 24/7?
Answer: Support availability may vary, but assistance is generally offered for installation, troubleshooting, and technical issues whenever possible.
Question: Is remote support secure?
Answer: Yes. Secure remote-access tools are used, and users maintain control throughout the troubleshooting session.
Question: Which versions of Family Tree Maker are supported?
Answer: Support is available for various Family Tree Maker versions, including FTM 2017, FTM 2019, and later releases.
Conclusion
When technical issues interrupt your genealogy research, professional assistance can help restore productivity quickly. Whether you need help with installation, syncing, backups, updates, or file recovery, our Family Tree Maker Support Number +1-888-257-3335 connects you with experienced technicians who can guide you through the troubleshooting process.
As an independent third-party support provider, we are committed to helping Family Tree Maker users resolve technical problems efficiently and continue preserving their family history with confidence.