You’ve spent hours typing ancestor names into Family Tree Maker, but a digital screen cannot replace the joy of holding a physical chart. According to common genealogy practice, sharing a tangible heirloom at family reunions is the most rewarding part of this journey.
Moving from database to paper begins at the top of your screen in the “Publish” workspace. Think of this tab as your layout workshop to perfectly print your family tree from Family Tree Maker without technical frustration.
Before using a single drop of ink, the “Print Preview” feature acts as a vital safety net. Checking this digital window prevents you from accidentally splitting a beautifully organized lineage across forty disjointed pages.
Why the ‘Publish’ Workspace is Your Printing Command Center
You have entered your ancestors’ names, but where do you go to build a physical family tree chart? In Family Tree Maker, the “Publish” tab is your creative workshop, separating your raw data from your printed masterpiece.
Before seeking Mackiev FTM chart printing tutorials, you must decide between Reports and Charts. Reports read like text-heavy history books, whereas Charts display those beautifully connected boxes. To find the right template, follow these steps:
- Click “Publish” at the very top of your screen.
- Select “Collection” on the left side.
- Click “Charts” to open the Chart Library.
Exploring this new library reveals multiple ways to organize your relatives visually. With so many options, you might feel unsure of where to start.
Pedigree vs. Descendant: Choosing the Right Layout for Your Family Reunion
Planning what to display at your next big gathering depends entirely on who is attending. When you compare pedigree chart vs descendant report layouts, you are deciding the direction your family story flows.
A traditional pedigree layout reads horizontally from left to right, focusing backward on one specific person and their direct ancestors. Think of this view as an arrow pointing to the past, making it a perfect, personalized gift celebrating an individual’s unique heritage.

On the flip side, generating descendant charts for family reunions creates a top-down umbrella starting with a common ancestor and cascading down to their living relatives. Because these trees grow incredibly wide, setting a generational limit prevents frustrating information overload on your final printed page.
Once the right structural foundation is in place for your specific event, the visual fun begins.
Making It Pop: Customizing Fonts, Photos, and Backgrounds Without the Stress
Making your chart visually stunning is a highly rewarding step. Over in the right-hand side-panel of your Publish workspace, you will find the Family Tree Maker chart customization options needed to turn basic text into a beautiful family heirloom.
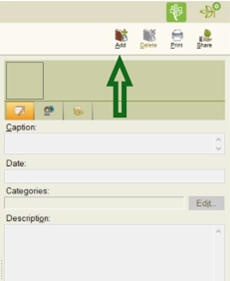
Think of the individual ancestor boxes as tiny, digital picture frames you can decorate. By exploring the box customization menu, you can quickly learn how to include photos in printed family trees, adding familiar faces directly next to the vital dates.
Adding scenic landscapes behind your tree is tempting, but managing chart backgrounds and font sizes requires careful balance so names remain legible. Run through this quick pre-print checklist:
- Pick a pale, semi-transparent background overlay so dark text stands out.
- Increase the overall text size if older relatives are reading it.
- Ensure portrait images look crisp on your screen to confirm their print resolution.
Once your customized portraits and colors look perfect, you might notice your masterpiece has suddenly outgrown a standard sheet of paper.
Solving the ‘Tiny Tree’ Problem: Scaling and Tiling for Any Paper Size
Squeezing five generations onto one sheet often requires a magnifying glass to read the names. The “Scale to one page” button sounds helpful, but shrinking your masterpiece drastically ruins your carefully chosen fonts.
Look instead for the scaling percentage slider. Think of this setting like a zoom lens; keeping it near 100% ensures your tree remains completely legible, even if it heavily outgrows standard Letter or Legal paper.

When your tree expands, the software begins “tiling,” which is perfect for setting up poster size genealogy diagrams. Tiling acts like a puzzle, dividing your large chart into overlapping standard pages you can physically tape together on your dining table.
This built-in overlap prevents names from getting chopped in half, instantly troubleshooting chart layout alignment issues at the paper’s edge. If taping pages sounds exhausting, however, professional printing offers an excellent alternative.
Professional Printing: Exporting High-Res PDFs for Large Wall Charts
Sometimes a taped-together project isn’t quite right for a family reunion display. Taking your masterpiece to a local print shop solves this seamlessly. By exporting a high-resolution PDF from Family Tree Maker, you guarantee your text stays crisp and never blurs when enlarged.

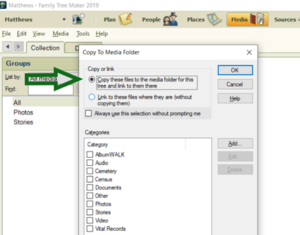
Creating this digital envelope is straightforward. Here is exactly how to export FTM trees for professional printing:
- Click the ‘Share’ button in the top right.
- Choose ‘Export to PDF’ instead of ‘Print’.
- Keep the quality settings on high.
- Save the file to a USB drive.
This secure format locks your layout directly in place, making printing large scale wall charts from Mackiev software stress-free for any professional. With your container perfectly packed, the final review process guarantees the best possible print.
Final Check and Paper Choice: The Finishing Touches for Your Heirloom
Before printing, double-check your facts. Using the Ancestry sync printing features in FTM ensures your latest online discoveries match exactly what hits the page. Think of this as your final proofread.
Finding the best paper for printing genealogy charts turns a basic document into a true heirloom. Look for a heavy “paper weight” that feels sturdy like a greeting card, alongside “archival quality.” This simply means the material is acid-free and won’t turn yellow or brittle over time.
Take one last visual stroll through your digital layout to catch any awkwardly cut-off names.
From Pixels to Paper: Your Action Plan for a Perfect Family Tree
You’ve successfully moved your ancestors out of the digital black box. Whenever you print a family tree from Family Tree Maker, you’ll confidently turn software settings into a legible masterpiece.
To ensure a flawless result, always run through this 5-step pre-flight checklist:
- Select your preferred chart in the Publish tab.
- Customize your fonts and colors.
- Adjust the “Scale” to fit your paper.
- Review the Print Preview window.
- Print directly or export your file as a PDF.
Holding a physical chart completely changes how your relatives connect with their roots. Whether framing a simple poster or creating a family history book with FTM, your research is now a beautiful heirloom ready to spark pride and connection at your next reunion.
Andy Smith is a genealogy researcher and family history specialist with over 10 years of experience in family tree research, ancestry records, and genealogy software. He specializes in Family Tree Maker, Legacy Family Tree, Ancestry, FamilySearch, and DNA-based family history research, helping users preserve and organize their family heritage.